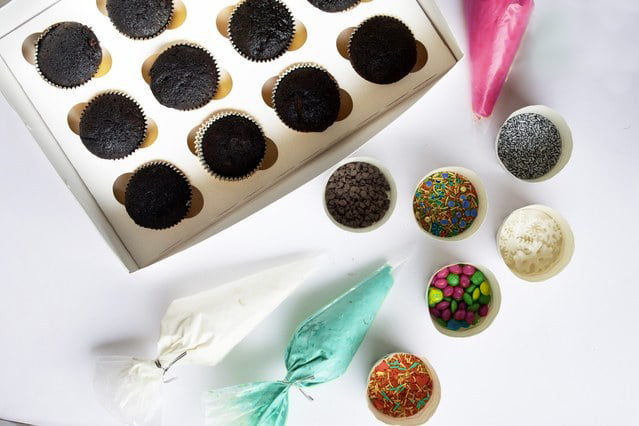
With the onset of COVID-19, the last few months have been challenging and scary for all of us. And with so many changes to everyday life, it’s been a whirlwind. The 12 Oaks team decided to create a new set of products to help distract from the stress of quarantine and working from home. So our DIY Decoration Kits were born! We’ve created both a DIY Cupcake Cake (available for delivery across Los Angeles) and a DIY Cake Pop Kit, which is available for nationwide shipping.
Whether you’re looking for a diversion for the kids or are in need of fun distraction yourself, the DIY Decoration Kits are the perfect remedy for when you’re feeling a bit stir-crazy. And huge plus: you get to eat the beautiful fruits (i.e. cupcakes and cake pops) of your labor! But you’ve never decorated a cake pop before? Or you’ve never used a piping bag to apply frosting to a cupcake? Not to worry! We’re here to help and have a few tips and tricks to get you started creating fun and delicious treats.
DIY Cupcake Kits
Our Cupcake Kit comes with 12 freshly baked 12 Oaks cupcakes, 3 frosting colors and 6 sprinkle and candy combos, delivered directly to your door in Los Angeles. You’re able to choose your cupcake and frosting flavors from among our many offerings. Our favorite combo is chocolate chip cake with classic vanilla buttercream frosting, but our clients’ top picks are our red velvet cake with classic cream cheese frosting and funfetti with classic vanilla buttercream (yum!). In addition, we also offer customization of the colors of the sprinkles, frosting, and candy included in the kit. The frosting will arrive ready to go in piping bags so you’re set to get to work once your kit arrives.
Piping Frosting Tips (pun intended)
If you’re new to using a piping bag to apply frosting to your cupcake, there are some simple techniques you can use to get a perfect frosting swirl. Once you become a master decorator, you’ll probably use a tip on the frosting bag, but since our frosting bags arrive pre-packaged without one, we’d suggest cutting off a tiny bit of the tip of the bag. Basically, start with a small cut since you can always cut a larger hole if needed, but you can’t go smaller! Since you’re not working with a traditional piping tip, it’s time to get creative! We always see a traditional swirl — why not try something new? Go in a zigzag pattern, try going up and down, do dots, etc.
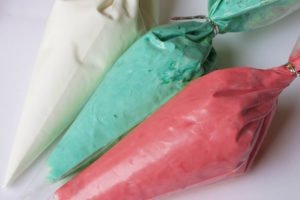
If you want to try your hand at making swirls, you should cut about a 1/2″ on the pastry bag to get a nice round opening to do the traditional swirl. Tip: Start in the center of the cupcake and go outward. And be sure to apply even pressure so you don’t end up with a lopsided frosted cupcake. Another fun option if you haven’t cut too much of the bag: you could try cutting different shapes. For example, try cutting a V in the bag and seeing what comes out. Just be creative! And for those trying to achieve more advanced frosting techniques, and who have their own pastry bags and tips at home, feel free to empty our bags and use your own.
Sprinkle Tips
Adding your sprinkles or candy is another way to get creative and have fun. One cool idea to try is to add different textures. For example, add some frosting, then cover it in sprinkles, and then add another frosting swirl in another color without the sprinkles, thereby giving the cupcake some interesting textures. Or try mixing 2 different sprinkles to create new sprinkle combos! In general, there are no bad ideas, when it comes to sprinkles, only more deliciousness!
DIY Cake Pop Kits
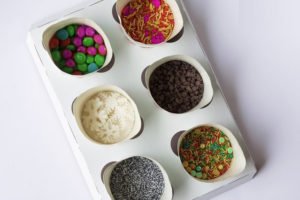
Our Cake Pops Kit arrives with a dozen freshly baked and dipped 12 Oaks cake pops, 3 candy melt colors and 6 sprinkle and candy combos. You’re able to choose your cake pop flavors from among our many offerings. We recommend the red velvet – it’s our favorite! Your cake pops arrive pre-rolled and dipped in candy melt (we’ve done the hard part for you), and are a blank canvas for your decorating inspiration. In addition, we also offer customization of the colors of the sprinkles and candy combos, and also the candy melt included in the kit. Plus, our cake pop kits can be shipped nationwide, so you can send some love and inspiration to friends and family who are also feeling antsy at home.

Cake Pop Decorating Tips
The most important thing to remember with the cake pop decorating kit is to be patient while melting the candy melt. This is why we fondly call them Labors of Love. Once the candy melt is melted, it will work as “glue” for the sprinkles and candy. However, it will also dry quickly, so you need to work fast. Should the candy melt harden, no worries, just pop it back in the microwave to soften.
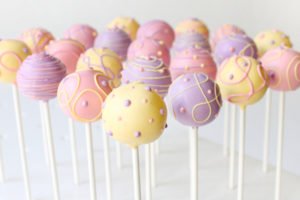
We recommend, again, starting with a small hole in the piping bag because you can always make them larger, but you can’t go the other way! Have fun with the designs – you can make swirls, zig-zags, polka dots, you name it! And it’s fun to mix ‘n match the colors. Here’s an example of some of our favorite cake pops. These don’t have sprinkles, but feel free to throw them onto your drizzle designs!
With either DIY Decorating Kit, you’ll find inspiration as well as a delicious treat awaiting you at the end of your endeavor. What a fun way to spend an afternoon — challenge yourself and your family to try something new! Order a DIY Cupcake Kit or DIY Cake Pop Kit on our website today!
Yours sweetly,
Katherine & Missy


